Best wishes for the year ahead,
Sandhya.

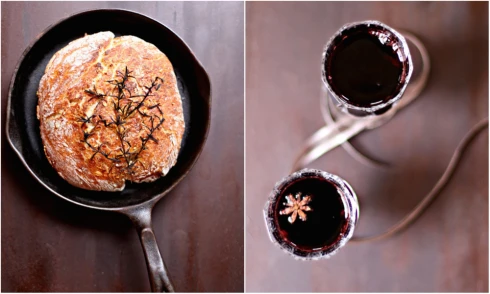
Vegetarian culinary adventures.
Best wishes for the year ahead,
Sandhya.
Now that summer has been bid goodbye, I look forward to the bounty of winter fruits and vegetables; apples, figs, pumpkins, beets, sweet potatoes…. Ah, sweet potatoes! They take me down memory lane; all the way to wonderful Delhi winters when coal roasted sweet potatoes would make their autumnal appearance in markets everywhere. We lived just a few blocks from the bustling Lajpat Nagar Market, where shakkarkandi vendors would set up shop in their portable hour glass shaped stands, signaling the arrival of winter.

I was fascinated by the Delhi markets. I had never before seen a one stop market, where hole in the wall shops, cart vendors, tented stalls and narrow multi-leveled air conditioned showrooms all coexisted in one crowded market square. You could shop for everything from fruits and vegetables to blinged out chappals to exquisitely embroidered shawls to homeopathic concoctions to spare parts for household gadgets and everything in-between. And of course street food, there was always street food. Aloo tikki, chaat and other food carts would be positioned strategically in every market. I’d buy a patha of shakkarkandi, spicy, salty, lemony and sweet all at the same time and gawk at the frenetic shoppers making their Diwali purchases, this time of the year. I used to live in the southern city of Chennai before moving to Delhi, where such markets didn’t exist. It was such a novelty for this new transplant to wander the crowded market while savoring a plate of street food.

The coal roasted shakkarkandi would be stacked in rows on a stand with tiny lemons and star fruit interspersed among them. I would wait in anticipation, my mouth watering as the vendor picks a sweet potato warming over hot charcoal and gingerly peels, dices and drops it onto a plate. With a sleight of hand worthy of a magician he would shower the plate with chaat masala, drench it with lemon juice, deftly toss the contents and hand it over with a flourish.
I pulled out my coal fired stove and roasted this season’s first batch of sweet potatoes. The char and smokiness of the charcoal is essential in creating the unique Delhi taste, though I am sure grilling will work just as well. Alternately you can bake in a standard oven. Chaat masala is widely available in Indian stores. I generally don’t buy prepared spice mixes so I made my own chaat masala. Sprinkling salt, pepper, cumin and chili powder is the next best alternative to chaat masala if you don’t have it.

Roasting over charcoal
I placed the sweet potatoes directly over the coal and roasted it for 30 minutes turning it a couple of times.

Baking in the oven
Pre-heat oven to 400 degrees
Make a few slashes with a knife or stab the sweet potatoes in a couple of places with a fork [this is to help release steam and prevent the tuber from exploding]
Roast with skin on, for about 40 minutes. A tooth pick should pass through, make sure you don’t over cook it.
Chaat Masala
1 1/2 tablespoons whole cumin seeds
2 whole cardamom pods
1 clove, yes just one!
A pinch of fennel seeds
1 teaspoon chili powder
1 1/2 teaspoons amchur
1-1 1/2 teaspoons powdered black salt
A pinch of nutmeg
A couple pinches of sugar
Salt if needed.
Toast the cumin in a pan over medium heat for one minute, shaking the pan to prevent burning.
Turn the stove off and add the cardamom, clove and fennel onto the pan and shake a few times to toast these spices also.
When cooled put the spices and the rest of the ingredients in a spice grinder and grind to a semi-fine powder.
Preparation
1 cup diced sweet potato
A generous sprinkling of chaat masala
Juice from half a lemon
Mix everything, stick a tooth pick and serve.

Thank for dropping by
Best, S.
Using peppers from my garden.

This should have be a very short post about pickling peppers. Chop peppers, add to vinegar, then salt to suit your taste. End of story. This is how I have been pickling peppers all along with excellent results. However I was curious to see how others were doing it. In Google land people were making special brine and canning them, pouring hot liquid over tender peppers [ouch], salting, rinsing and then canning them, one recipe even called for blanching before canning! My pickled Jalapeno from last year is still in great condition, in fact it has even improved with age. I am quite careless with it, it lives in the fridge most of the time though sometimes it is left outside for days on end. Sometimes, bare fingers have fished out peppers when no one is seeing. And yet it has survived.

Sigh! I can’t let well alone, even if something works well. I decided to pickle a batch using hot brine method per Google and another batch following my usual recipe. It will be interesting to see how they fare over time.
Sterilizing
A very important thing to remember before pickling is; sterilize everything that you are going to use in the pickling process. I put the jars and lids in a water bath and let the water come to a boil and simmer for at least ten minutes. I even stick the blade of the knife in the water bath for a few minutes to sterilize it. I also wash the cutting board with the sterilized water and then air dry everything.
1] My usual method
2 1/2 cups apple cider vinegar [Bragg]*
1/2 tablespoon pickling salt or kosher salt
1/2 lb mixed peppers [see Food Note]
*In the past I have only used distilled white vinegar for pickling but this time I used raw unpasteurized Apple cider vinegar.
Sterilize jars and lids. Remove the jars and lids from the water bath and allow it to air dry in a warm oven. I turn the oven on for a couple of minutes and then turn it off.
Meanwhile cut the larger peppers into rings. Remove seeds and discard if you wish. You can leave small peppers whole but they have to be pierced with a fork or slit along the length so the brine gets inside to work its magic.

Dissolve the salt in the vinegar. You can add spices or garlic to the vinegar at this time if you wish. I added a garlic scape head from my garden.
Pack the peppers in the jar and pour the vinegar over it till it comes almost to the top of the jar. Check to see that the peppers are completely submerged. Any exposed pepper will spoil the whole batch. In fact I keep the jar inverted for a couple of days so the peppers on the top are pickled. The peppers are ready almost immediately though the flavors round off in about a week.
I am sure they will last a year as mine have every time, though it is a good idea to store in the fridge.
2] The method using hot brine
2 1/2 cups white vinegar
1/2 cup water
1/2 tablespoon pickling salt or kosher salt
1 teaspoon sugar
1/2 lb mixed peppers
In a non-reactive pan bring everything to a boil except the peppers and simmer for about 10 minutes.
Remove the caning jars out of the sterilizing bath and pack with peppers* right away while the jar is still hot.
*See method 1 for instruction on how to prepare the peppers.
Pour the hot brine over the peppers.
Wipe the rim of the jar and screw the lid on tight.
Cool to room temperature and store in the refrigerator. In fact pickles made this way are called refrigerator pickles. They can last up to a year.
Food Notes
I used super chilies, habanero, cherry peppers and Thai chilies from my garden. Fresno, cyklon, hinkle hatz and frying peppers from a friend’s garden.
Pickling salt or kosher salt is recommended as they are more pure than table salt, which has additives.
The pickles will discolor over time.
The pickles loose their crunch and tend to get a little soft as they age.
If you want crunchy pickled peppers make small batches to be used in a short time. In my case I had a lot of peppers from my garden which I had to use before winter.
The brine from the jar can be used in interesting ways, in salad dressings, to spike soups and vegetables, on fries, sandwich toppers….

Thanks for dropping by
Best, S.
Cooking with Green Tomatoes and Chilies from my garden.

Today, my green tomatoes are the stars in my kitchen. I pulled out the last of my tomato plants and harvested all the tomatoes that have not had a chance to ripen. I look forward to this end of summer crop so I can make my favorite pickle from my childhood. It is simplicity itself. I hope this recipe is useful to all of you looking for new ways to use them. Agreed, a few of the ingredients might not be available in a non Indian home. I am sure you have some Indian friends who’ll be more than happy to lend them to you. Or else they are readily available at Indian stores.

Green Tomato Pickle
3 cups green tomatoes, chopped
2 tablespoons oil
1 teaspoon brown mustard seeds, whole
2 or 3 mild green chilies, chopped or slit
1/4 teaspoon ‘hing’ or asafoetida [this is what you’d borrow from your Indian friend]
6 curry leaves, [this too]
salt to taste
Warm the oil and drop the mustard seeds in it. Wait till they pop, turn the stove off. Add the green chilies, hing, curry leaves and salt. Twirl everything in the pan. Pour over the chopped tomatoes. Mix everything together. Let it rest for at least fifteen minutes to incorporate all the flavors. Must be refrigerated after half a day. Use within a couple of days.
Serving suggestion, mix with rice.
Thanks for dropping by
Best, S.
Cooking with cucumbers from my garden.

Here are my last few posts about cooking from my garden for the year 2012. I pulled out my remaining cucumber plant a few days ago which still had a few cukes on the vine. I had left them on to mature on the plant so I could prepare this off the beaten path kind of a dish where the cukes are cooked in a coconut mustard sauce.

I’ve noticed some of my home grown cucumbers have a bitter taste just like the ones that I used to eat in India. The department store cukes never seem to have that problem, maybe their growers know something the average home gardener does not know.
Let me share a tip that is widely practiced in India, for eliminating the bitterness from a cucumber. Cut the tip off a cucumber and rub both ends vigorously. A whitish foamy substance oozes out, continue rubbing till all of it comes out. Then cut at the other end and repeat. This way the bitterness causing compound called cucurbitacins are pulled out and you have a perfectly edible cuke. This may be sound like an old wives tale but I swear by it.

The cucurbitacins apparently reside just under the skin and near the stem end, so if a slice of cucumber tastes bitter, peeling the cucumber deeply should also work.
Cucumber in coconut, mustard and yogurt sauce
1/2 teaspoon whole mustard seeds, brown
1/3 cup grated coconut, fresh or frozen
1 hot Thai chili pepper
1 1/2 cups of diced, mature cucumber [peeled]
3/4 cups plain yogurt
Salt to taste
A few curry leaves for garnish
Soak the mustard in a tablespoon of warm water for about fifteen minutes.
Then grind the mustard, coconut and chili in a cup of warm water to a smooth puree, making sure the mustard seeds don’t remain whole.
In a saucepan put the coconut mustard puree, the diced cucumbers and salt to taste. Cook till the sauce is bubbling for at least a couple of minutes.
Cool and add to the yogurt. Granish with curry leaves.
Serve with rice and a spicy dish or just plain Naan.
Thanks for dropping by
Best, S.
Let me take a break from bringing you recipes from my garden, to tell you about a neat way to grow plants when you have very little outdoor space. I recently came across this post and I was hooked.
I live in a town house and have a very tiny garden. While I have plants from summer taking up most of that space I need to start seeds to harvest lettuce and other greens in the coming months. With inspiration from the Gardening Services Auckland site, I made my hanging wall garden with gutter planters.

Here is a step by step of how I put it together.
Buy a length or two of gutter or as they call it in NZ, spout. I bought the lightest in the store which was made from aluminum and it came in 10‘lengths. Depending on how many pieces you are going to cut it, buy that many pairs of end caps to seal the sides.
Take a vehicle that will fit the gutter as they don’t cut metal in the home improvement store. Luckily I was helped by a gentleman in the parking lot. I was trying to fit the gutter in my small car but it was sticking out on both ends by more than a foot. He came over and offered to help me and asked me to put the back seat down so one end of the gutter could be fit into the trunk of the car. I told him Oh! no my back seat doesn’t go down, because I only had the car for nine years and that had never happened before. He very sweetly asked if he could show me how it was done. In one click he pressed a button which I swear wasn’t there before and down went my back seat and in went the gutter!
Anyways…
I cut the gutter into 2’lengths. As you can tell by now other than wanting to create a hanging wall garden I had no plans on how to go about it. Everything I did was on the fly. I drilled holes for drainage and a couple more at the end to run a wire through to hang from my fence. I had plastic glitter wire from a past craft project which I ran through the outermost holes and hung the gutter by looping it through a lattice trim on my fence.

Then this happened. The trench did not stay up to be able to hold soil.

Luckily the front top part of the gutter [this is the first I am getting up close and personal with a gutter] actually has a lip which is folded over creating a gap. I threaded some wire through this and pulled the gutter and lifted it and tied the wire to the top of the fence. This also gave some central support to the system.

I fit the end caps, Voila! a nice hanging trench.

I laid an inch or so of mulch to cover the drainage hole instead of the standard rocks as it might make the whole contraption too heavy. Then I filled it with soil and voila a soil bed is ready.

I am also planning to grow my winter greens in these planters, at least some of them till my garden patch becomes available. I still have a patch of Okra, another patch of basil, peppers and roselle [gongura] and another patch where I am supporting one cucumber plant on several tomato plants! Once I pick the last of my cukes and the okra are pulled out I’ll be able to grow lettuce in those patches. In the meantime the seedlings will be getting ready in these gutter planters. Hopefully it will work out as I am trying this for the first time. I can’t tell you how excited I am to have come across this idea. I’ll post pictures when I have something decent sized growing in the trenches.
Would love to hear from you if you attempt this. The way I put it together may not work for you. Please be careful as this will get heavy when the soil is watered, so be mindful of how you hang it.
Thanks for dropping by
Best, S.
The last few days I have been cooking from my garden. Yesterday I made chimichurri with a mélange of herbs. Today I’ll share a couple of simple ideas on how to use the condiment. Before that let me show off my garden beauties once again.

A good looking bunch, right? The cantaloupe was a disappointment though. It wasn’t very sweet. We looked at each other as we ate it, not wanting to be the first to say ‘our cantaloupe’ didn’t have much flavor. Drizzled some chimichurri sauce, sprinkled some S & P and the melon was transformed.

Isn’t it a neat idea to skewer melons? Not mine though, something I came across while visiting China.

Here is another way to use chimichurri, flavor brown rice and edamame or rice and tofu with chimichurri for a simple salad meal.

Thanks for dropping by.
Best, S.
Herb sauce/condiment made with thai peppers and herbs from my garden.

Many people I know grow at least a couple of different herbs. As window decoration. It gives them great joy to nurture. Some even grow herbs in beautiful containers in their patio. As patio decoration. These are normal people [read, not bloggers or food obsessed people] who go about their daily lives watering their pots and window sill gardens till winter arrives and the herbs die their seasonal death. Without ever having graced any dish.
True story as told to me by garden club members to whom I gave a talk a while ago! The topic, how to include herbs in everyday life. Here is a simple idea for anyone who grows herbs. It doesn’t matter if you have one or two or several herbs growing. You can always make chimichurri. It is basically a parsley sauce from Argentina which is popular throughout South America. The other components are garlic, vinegar, oil, salt, and red pepper flakes.
You can substitute parsley with any or several herbs that you have growing. Use good quality ingredients as this is fresh sauce.
Here is my version from what is growing in my garden.

Chimichurri
1/4 cup red wine vinegar
1/4 cup olive oil
1/2 cup mixed herbs [I used mint, oregano, basil, thyme and garlic chives, alas no parsley]
1 Thai pepper
Salt to taste
I skipped the garlic as I always do, but please add as per your taste.
Chop all the herbs, add it to the oil and vinegar and season.
This sauce is very versatile. It makes an excellent salad dressing.Tomorrow, some very interesting ways to use chimichuuri.
Hope you’ll put your garden herbs to good use.
Thanks for dropping by,
Best, S.
Cooking with end of summer tomatoes and garden herbs.

At this time of the year in the North East home gardeners are probably pulling out their tomato plants. The fruits are getting smaller, there are worm holes in them and the plant is an eye sore. I would say hold off a little bit more to give the remaining green tomatoes a chance to get a little bit bigger. I’ll share a green tomato recipe later. For now, what to do with the small misshapen, flavorless orange-red tomatoes? How about cooking them with some insipid grits? Two negatives make a positive, right?
I would hear over and over again my friends say their single most hated dish was grits. I bought some to check it out. The instructions were to practically cook it in butter and smother with cheese. That sounded like a one note dish. I love carbs so I knew I was going to love grits. It was so easy to think of flavoring it with grilled tomatoes, herbs and lots, I mean lots of salt. That is how I like it and this South Indian girl eats far more grits than any Southern girl, I am sure of it!

There is no recipe as such for the tomato grits. Prepare grits according to package instructions [In just plain water, no butter please]. Slice or cut tomatoes in half and arrange in a baking dish. Drizzle a good quality oil, and broil on high till brown spots appear on the tomatoes. You can then turn the tomatoes over and blister on the other side though I skip this step most of the time, like today. Plate the grits, drizzle some olive oil, add the broiled tomatoes, garnish with basil and other herbs of your choice. Salt liberally. Add pepper, pepper flakes or dashes of hot sauce, whatever you prefer and enjoy. You won’t be a hater anymore!
Food Notes.
Thanks for dropping by,
Best, S.
Cooking with white eggplants and onions from my garden.

I enjoyed growing this variety of eggplant in my garden. It was a visual delight, growing in elegant white clusters amidst beautiful star pointed purple flowers. It was also surprisingly mild and sweet tasting.

After I came back from my trip towards end of summer, I was only able to harvest a few eggplants, not enough to make a substantial dish for the whole family. So I decided to stretch the vegetable by adding it to rice to make an Indian rice dish called Vangi Baath or Eggplant Rice. This is traditionally made in western and southern parts of India.
The vegetable is cooked with a premade spice powder and then added to rice to make a less fussy version of a pilaf.

Vangi Baath or Eggplant Pilaf
Cook 3-4 cups of white rice and set aside.
For the spice powder
½ tsp oil
1 tbsp yellow split peas [Chana Dal]
2 tbsp coriander seeds
1 tbsp cumin seeds
5-6 whole dried Red Indian chilies
Warm a small pan with oil. Add the split peas and coriander, stir continuously till fragrant and the split peas are toasted to a light brown hue. Next add the cumin and red chilies and toast for a few seconds. Turn the stove off, cool and grind the spices to a fine powder.
To prepare the vegetable
3 tbsp oil or ghee
1 tsp whole mustard seeds
A few curry leaves
2 cups diced eggplant
1 cup diced onions
Salt to taste

A small amount of tamarind soaked in a 1/4 cup of hot water [see pic]. When cool, squeeze the tamarind to extract the pulp. Discard the remnant fibres.
Soak the diced eggplant in water for ten minutes to leech out any bitterness, then drain.
Warm oil in a pan, add the mustard seeds and let it pop, add the curry leaves.
Sauté the drained eggplant and onions till the eggplant is almost cooked, about 12-15 minutes.
Add salt, the tamarind extract and 1-2 tablespoon of spice powder and cook for a minute.

Putting it together
Spread 3-4 cups of rice on a wide plate. Add the cooked eggplant to the rice and gently mix so the rice doesn’t clump together. Adjust for salt, put in a dish and serve, with raita and papad or potato chips.
Thanks for dropping by,
Best, S.
