Let me take a break from bringing you recipes from my garden, to tell you about a neat way to grow plants when you have very little outdoor space. I recently came across this post and I was hooked.
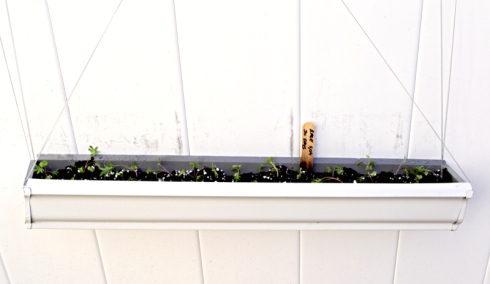
I live in a town house and have a very tiny garden. While I have plants from summer taking up most of that space I need to start seeds to harvest lettuce and other greens in the coming months. With inspiration from the Gardening Services Auckland site, I made my hanging wall garden with gutter planters.
Here is a step by step of how I put it together.
Buy a length or two of gutter or as they call it in NZ, spout. I bought the lightest in the store which was made from aluminum and it came in 10‘lengths. Depending on how many pieces you are going to cut it, buy that many pairs of end caps to seal the sides.
Take a vehicle that will fit the gutter as they don’t cut metal in the home improvement store. Luckily I was helped by a gentleman in the parking lot. I was trying to fit the gutter in my small car but it was sticking out on both ends by more than a foot. He came over and offered to help me and asked me to put the back seat down so one end of the gutter could be fit into the trunk of the car. I told him Oh! no my back seat doesn’t go down, because I only had the car for nine years and that had never happened before. He very sweetly asked if he could show me how it was done. In one click he pressed a button which I swear wasn’t there before and down went my back seat and in went the gutter!
Anyways…
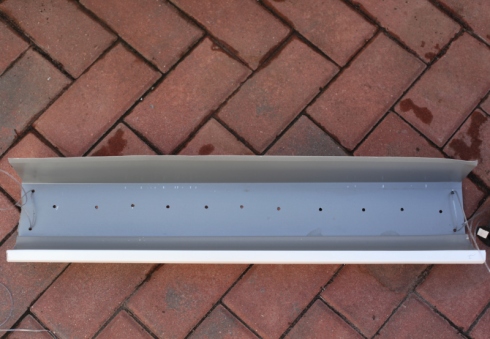
I cut the gutter into 2’lengths. As you can tell by now other than wanting to create a hanging wall garden I had no plans on how to go about it. Everything I did was on the fly. I drilled holes for drainage and a couple more at the end to run a wire through to hang from my fence. I had plastic glitter wire from a past craft project which I ran through the outermost holes and hung the gutter by looping it through a lattice trim on my fence.
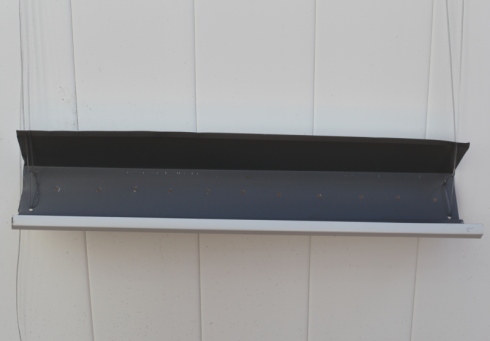
Then this happened. The trench did not stay up to be able to hold soil.
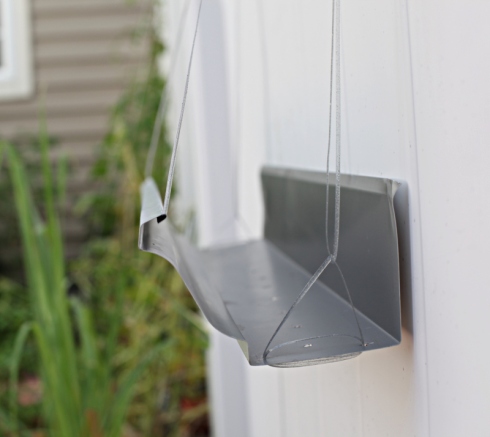
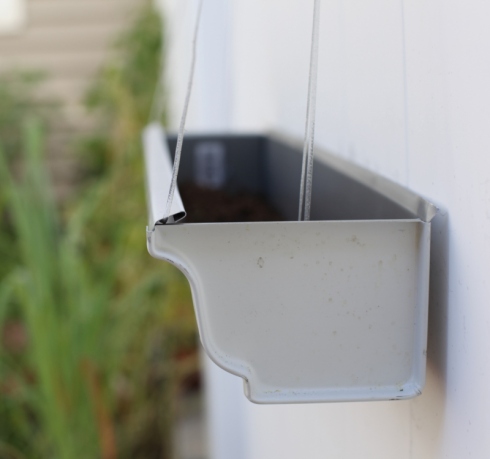
Luckily the front top part of the gutter [this is the first I am getting up close and personal with a gutter] actually has a lip which is folded over creating a gap. I threaded some wire through this and pulled the gutter and lifted it and tied the wire to the top of the fence. This also gave some central support to the system.
I fit the end caps, Voila! a nice hanging trench.
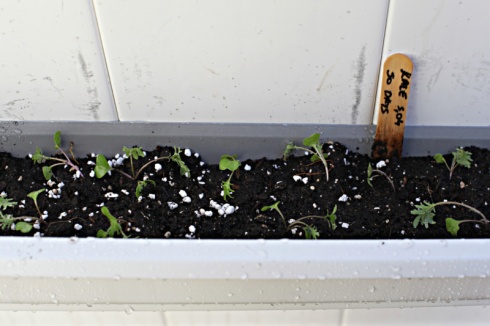
I laid an inch or so of mulch to cover the drainage hole instead of the standard rocks as it might make the whole contraption too heavy. Then I filled it with soil and voila a soil bed is ready.
I am also planning to grow my winter greens in these planters, at least some of them till my garden patch becomes available. I still have a patch of Okra, another patch of basil, peppers and roselle [gongura] and another patch where I am supporting one cucumber plant on several tomato plants! Once I pick the last of my cukes and the okra are pulled out I’ll be able to grow lettuce in those patches. In the meantime the seedlings will be getting ready in these gutter planters. Hopefully it will work out as I am trying this for the first time. I can’t tell you how excited I am to have come across this idea. I’ll post pictures when I have something decent sized growing in the trenches.
Would love to hear from you if you attempt this. The way I put it together may not work for you. Please be careful as this will get heavy when the soil is watered, so be mindful of how you hang it.
Thanks for dropping by
Best, S.

1 comment
Comments feed for this article
October 11, 2012 at 9:42 am
Karin@yumandmore
oh I saw this too and went out and bought them in Junly but never installed. LOL next year is crop year though – definitely!